Measure how fast water flows using ordinary objects at home!
Author
Lisa Muiznieks, PhD
Publication Date
Keywords
flow rate
Liquid speed
water flow
flow sensor
experiment at home
fluidic measurements
Your microfluidic SME partner for Horizon Europe
We take care of microfluidic engineering, work on valorization and optimize the proposal with you
Fun with fluidic measurements
Objects for measuring things are common all around you, including at home, school and work, on the street, and in the grocery store!
Many values are measured every day, like distance, height, time, temperature, direction, weight, sound and volume, to name a few. These values can be measured as single points, like weighing out the amount of flour required to make a cake, or as multiple points over time, like tracking a growth spurt or the speed of a moving car.
Reflection activity: How many everyday tools can you think of that are used for measuring?
(Here are a few we thought of: ruler, measuring tape, calipers, bathroom scales, kitchen scale, measuring cups and spoons, stop watch, thermometer, protractor, compass, speedometer…)
Our lives are full of movement and liquid is no exception. Being able to accurately measure the flow rate of liquid is particularly useful. There are many reasons why we should care about measuring the speed of flowing liquid in our daily lives. Each household pays for the amount of water they use per month. Car drivers pay for the amount of petrol they put into their car. Clearly, getting it right is important!
Liquid flow meters (also called flow sensors) are there to do the job. At a petrol station, a flow meter measures the volume of petrol delivered through the dispenser into your car (and you pay in €/L). In your home, a flow meter records the total volume of water that flows through your taps, shower, garden hose (here, the cost per usage is typically reported as €/m3 or €/L).
Fun fact: At Niagara Falls, an incredible 168.000 cubic meters of water cascades over the Horseshoe Falls every minute (that’s 168.000.000 L/min)! (This volume is harnessed as hydroelectricity to supply homes with energy). In comparison, water flowing from a shower head is a more modest 8-12 L/min. (Water saving shower heads can regulate and economise water flow too).
Download the art & science pdf!
Flow rate is fun to measure at home! Try these simple experiments to measure the flow rate of water in completely different ways.
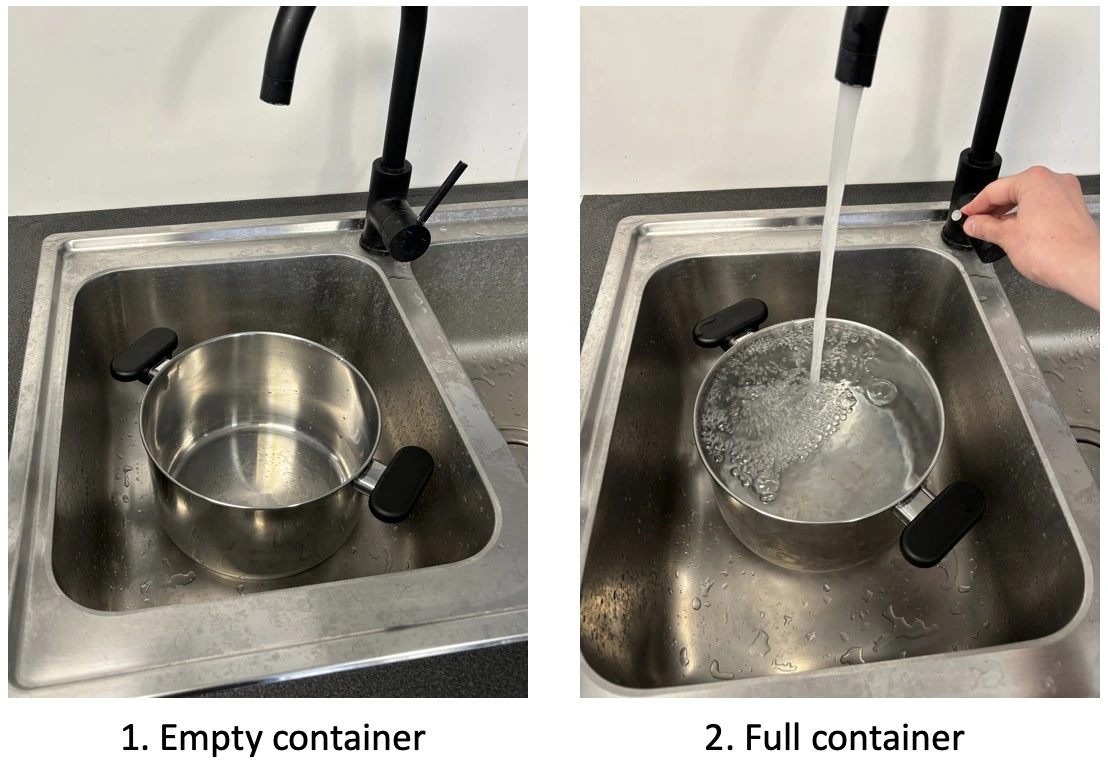
Activity 1: How fast does water flow from your tap?
Material
- A large container of known volume, e.g. 5 L cooking pot (note that a large container will get heavy when full of water, so set it down securely before starting. Alternatively, use a 1-2 L drink bottle, clear so you can see when it is getting full)
- Tap or other water source, e.g. a kitchen sink or garden hose
- Measuring device: timer, g. second hand of a clock, cell phone timer
Method
- Sit the container securely under the tap
- Turn on the tap to its maximum position and immediately start the timer
- Stop the timer as soon as the container is full
- Turn off the tap
- Repeat several times to calculate an average flow rate
Calculate your flow rate!
Calculate your flow rate in terms of volume per time, e.g., liters per minute (L/min):
- Start by writing down the known volume of your container and the total time it took to fill. Make sure to add your units to this expression!
- Convert this into L/min
- Then repeat the experiment several times and take the average
- Example 1: if a 5 L container was filled in 35 seconds, write this as: = 5 L/ 35 s
- Now convert this into L/min:
= 5 x ![]() L/min
L/min
= 8.6 L/min
- Example 2: If it took 10 seconds to fill a 1.5 L bottle, this is: 1.5 L/ 10 s.
- Convert into L/min:
= 1.5 x ![]() L/min
L/min
= 9 L/min
Super scientist: Think about how these parameters may affect flow rate
- Will your measurement be more accurate if you use a container with a larger or a smaller volume (e.g. a 10 L bucket or a 250 mL measuring cup?)
- Do you find any difference between the flow rate of a kitchen sink, a bathroom wash basin or an outdoor hose?
Bonus: Estimate flow rate next time you are at the petrol station
You can also time how long it takes to fill your car with a given volume of petrol and calculate the flow rate of petrol from the pump!
Activity 2: How fast does water flow through a plant?
Material
- Plant with large leaves (can be an indoor potted plant or an outdoor tree)
- 1 large clear ziplock bag
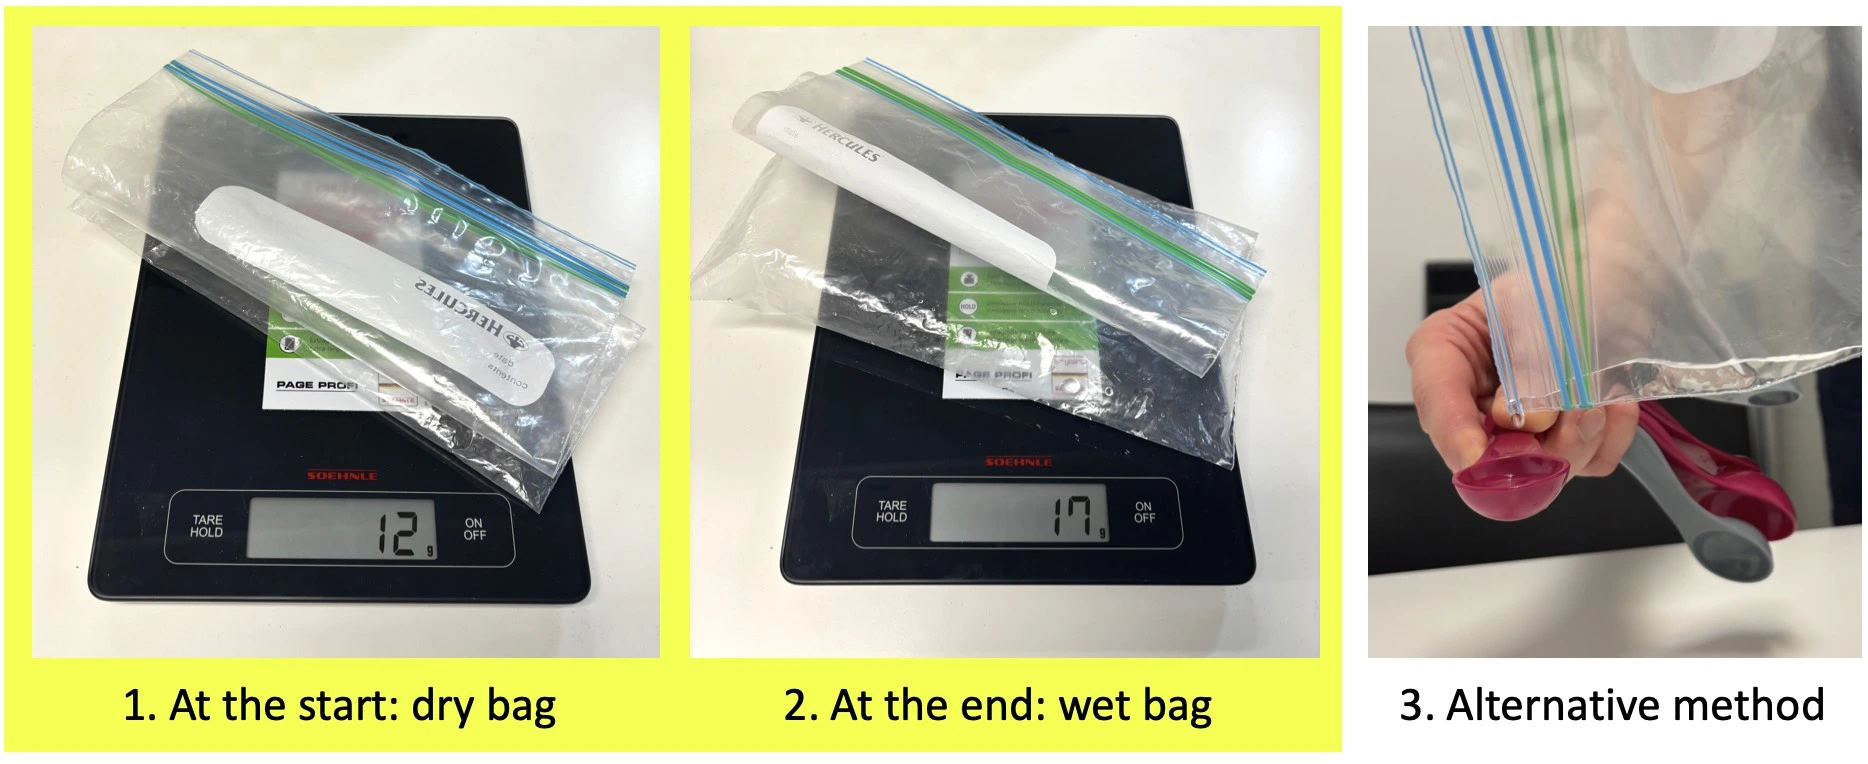
- Measuring device: kitchen weigh scale or a measuring spoon/cup
Method
- Weigh a dry, empty ziplock bag using kitchen scales
- If you don’t have kitchen scales and plan to use a measuring spoon later, then you can skip this step
- Place the ziplock bag over a large leaf and press the top closed around the branch
- Leave the plant in a warm place for faster results, g. in sunlight
- Note down the exact time you started the experiment
- Wait and watch as water collects in the bag. This might take anywhere from a few hours to a few days
- Once water has collected in the bag, carefully remove the bag from the leaf and zip the top closed
- Note down the time you stopped the experiment
- Weigh the ziplock bag using kitchen scales
- If you don’t have kitchen scales, carefully tip the water into a measuring spoon or cup. Choose the cup size depending on the volume of water collected
- Repeat several times to calculate an average flow rate
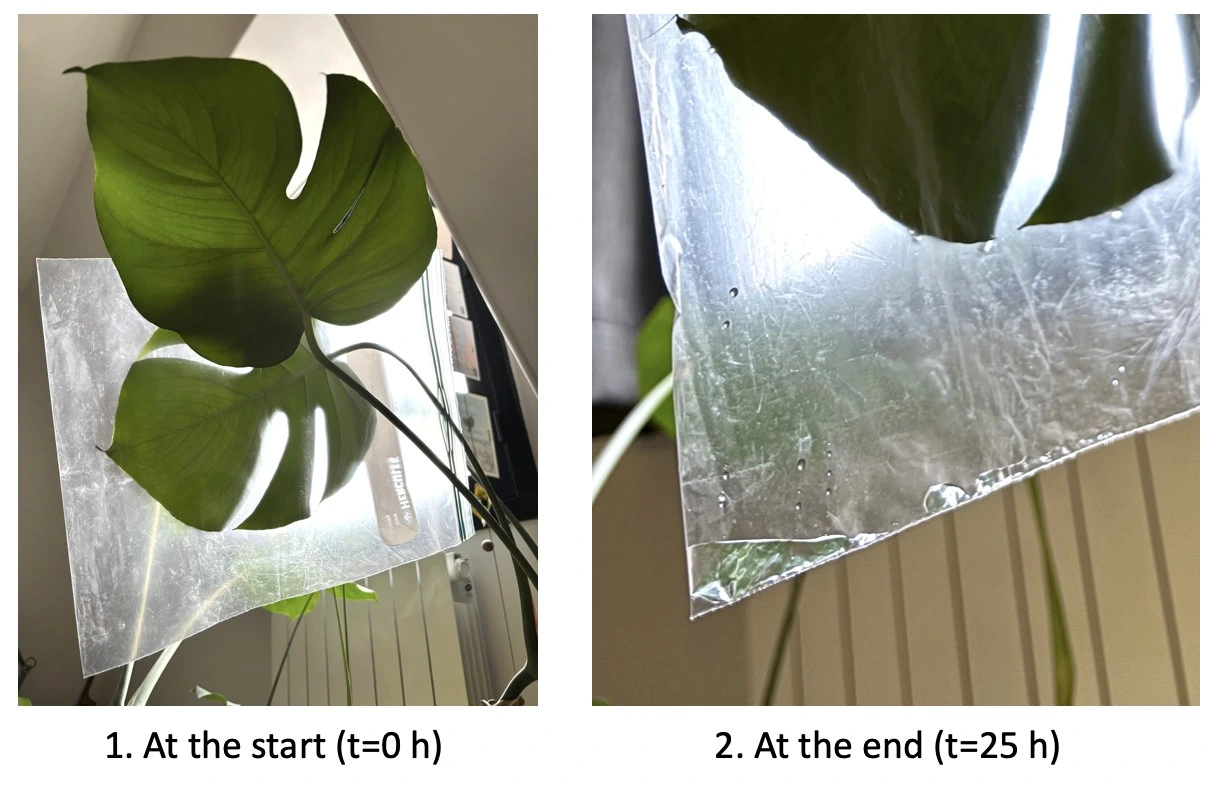
Observation: Water will start to become visible as small droplets on the edges and tip of the leaf. It will drip into the bag as more and more water flows from the leaf.
Explanation: Plant “transpiration” is the name given to the flow of water through plants from their roots to the tips of their leaves, where it then evaporates. Water flows in plants through a series of long, thin channels running up the stem, called xylem (you can even see these channels in the woody stalk of cut celery!). In these channels, water molecules move by capillary action, using forces of adhesion (water molecules sticking to the channel walls) and cohesion (water molecules sticking to other water molecules). Plants can modulate the rate of water evaporation by closing small pores, called stomata, on their surfaces.
Calculate your flow rate!
- Method 1: Weigh the bag and water
- Subtract the empty weight of the bag from the final weight: 17 g – 12 g = 5 g
- Convert g to mL (note: 1 g = 1 mL for pure water): 5 g = 5 mL
- Convert to an average flow rate:
- Calculate the number of hours of your experiment: Started Saturday 10 am, stopped Sunday 11 am = 25 h
- Express flow rate as volume per time:
= 5 mL / 25 h
= ![]() mL/h
mL/h
= 0.2 mL/h
Method 2: Measure the water volume with a measuring spoon/cup
- Select the size of measuring spoon that is best suited to the volume of liquid in your bag, e.g. ½ teaspoon, 1 teaspoon, 1 tablespoon etc
- Carefully pour the liquid from the bag into the spoon
- Estimate the volume of liquid in the spoon. Note that the spoon might not be perfectly full (note: 1 teaspoon = 5 mL, 1 tablespoon = 15 mL)
- Convert to average flow rate (see steps above in “Method 1: Weigh the bag and water”)
Super scientist: Think about how these parameters might affect the flow rate of water
- How hot was it on the day of the experiment?
- How big was your leaf? What if you tie a bag around a large bundle of leaves on a tree compared to a single leaf on an indoor potted plant?
Fun fact: You can estimate your sweat rate during an exercise session in a similar way!
Sweat rate = (your body weight before activity – body weight after activity + fluid intake – urine volume) / exercise time in hours
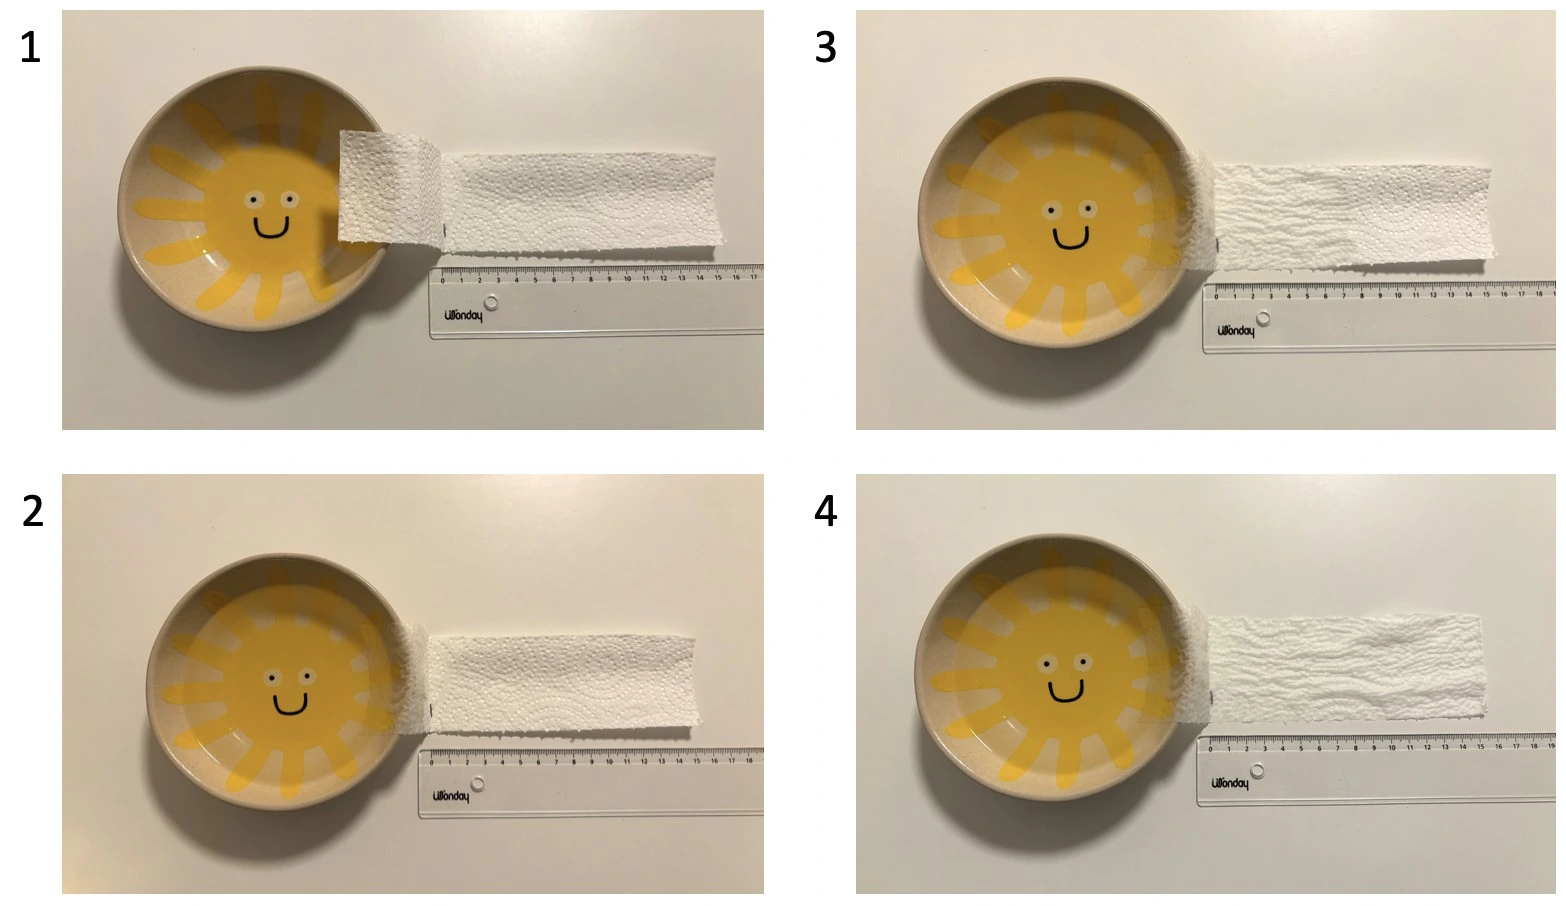
Activity 3: How fast does water flow through a paper towel?
Material
- A few pieces of paper towel
- Optional: scissors
- Dish of water (a flat dish is best, like a saucer)
- Optional: food dye
- Pen
- Ruler
- Timer
Method
- Cut or fold the paper towel into several long strips about 5 cm wide
- Use your ruler and pen to make a mark on the paper towel strip about 15 cm from the end
- Fold along this mark
- Arrange the paper towel strip over the lip of the dish (see figure panel 1)
- Add water to the dish
- Optional: add drops of food dye to the water in the dish
- Push the starting 2-3 cm of paper towel into the water
- Watch the water soak into the towel (see figure panel 2)
- Start the timer when the water reaches the pen mark
- Stop the timer when the water reaches the end of the paper towel (see figure panel 4)
- Repeat several times to calculate an average liquid speed
Observation: The water moves along the paper towel as the towel soaks up the liquid.
Explanation: Capillary action (much like the plant experiment!). Adhesion forces (between water molecules and the paper towel fibers) and cohesion forces (between water and water molecules) help the water to wick up the paper towel right to the end.
Calculate the speed of your liquid!
Note that this value indicates the average speed from the start to the end of the experiment.
- Test 1: If it took 5 min 24 seconds for water to travel the length of a 15 cm long strip of paper towel, write this as distance per unit of time (e.g. cm/min):
= 15 cm/ 5 min 24 s
= 15 cm/ 5 + ![]() min
min
= 15 cm/ 5.4 min
Convert into an average speed: = ![]() cm/min = 2.8 cm/min
cm/min = 2.8 cm/min
- Test 2: If it took 4 min 6 seconds to completely wet a 15 cm strip of paper towel, this is:
= 15 cm/ 4 min 6 s
= 15 cm/ 4.1 min
= 3.7 cm/min
Super scientist: Try this alternative method to measure how speed changes with time
- Extra material needed: pen and paper to write on
- Set up the experiment as described above
- Align the zero point of the ruler with the pen mark you made on the strip of paper towel
- Start the timer when the water reaches the mark
- Record the time when the water front crosses each centimeter mark on the ruler
- Stop the timer when the water reaches the end
- Calculate the speed for each centimeter interval
- If you are feeling adventurous, plot the speed (the “dependent variable”; on the vertical axis) against the length of the paper towel strip (the “independent variable”; on the horizontal axis).
- How do different paper towel types affect the speed of water (e.g. recycled paper towel or towel with a dimpled pattern versus smooth surface)?
Fun fact: The average speed of blood in the body is about 0.3 m/s in large vessels close to the heart (like the aorta) and slows down to around 1 mm/s as it reaches smaller capillaries. Let’s compare these speeds with your experiment above:
- 0.3 m/s = 1800 cm/min
- 1 mm/s = 6 cm/min
Final food for thought: Flow on a mighty small scale!
Until now we have talked about measuring fairly visible flow rates in L/min or mL/min. How about measuring a single droplet of water or smaller? One droplet from an eye-dropper can be as small as 20 µl (pronounced “microliter”; there are 1000 microliters in 1 mL!).
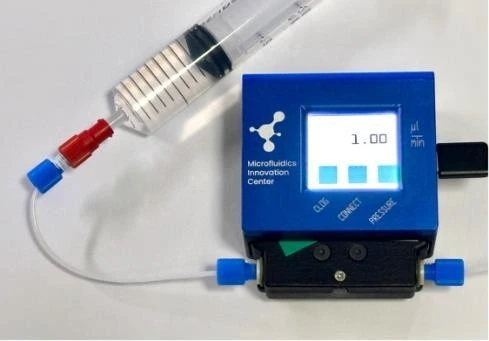
There are highly accurate instruments that can measure the tiniest of water droplets, like our “Galileo flow sensor”. These flow sensors can be used by researchers in the laboratory doing scientific experiments to model our tissues and organs, to understand diseases and test new medicines.
Thank you for participating in the MIC Flow-a-thon! We’d love to hear about your experience – what you enjoyed and what you learned. Share your thoughts with us through this link.
Acknowledgement
This “Science at Home” activity is part of a project that has received funding from the European Union’s Horizon research and innovation program under HORIZON-EIC-2022-TRANSITION-01, grant agreement no. 10111309 (GALILEO).

![]()
FAQ - Measure how fast water flows using ordinary objects at home!
What is “flow rate” in these home experiments?
Flow rate is the volume of liquid passed per unit time. Here, it is usually expressed as volume/time (such as liters/minute, L/min), although the paper-towel activity also includes speed in terms of distance/time (such as cm/minute). Pretty much the same principle: there is something going on, and you are betting something about it.
Activity 1: What is my rate of tap flow with near minimal equipment?
A known-volume container and a timer. Place the container under the tap and set the tap to a fixed rate (recommended in the article to be at its maximum). Start the timers when the container has reached its familiar volume, stop when the timers have elapsed, then repeat the process a few times and average the results. The repeat section is more important than some may think; if you take a half-second hesitation, one run will be strangely out of tune.
How can I convert the volume of a filled container in X seconds to L/min without thinking too hard?
Put it in the form of volume/time, with units, and then convert seconds to minutes. Two examples given:
5 L filled in 35 s – about 8.6 L/min
1.5 L filled in 10 s – 9 L/min
An important suggestion to keep in mind: do your arithmetic when you have repeated the measurement several times. Otherwise, you will be just running around chasing noise.
Activity 2: What is meant by water flowing through a plant- plants are not pipes, right?
They are not pipes in the engineering sense, but they do conduct water continuously between roots and leaves. This is the process of transpiration: water is moved up through long slender aisles known as xylem, after which it is evaporated at the surface of the leaf. To do the activity, one puts a transparent zip bag around a leaf and waits until droplets form and collect the water. It is slow (taking hours to days), which is why it is interesting.
How can I measure plant flow without lab equipment?
There are 2 low-tech alternatives proposed:
Weighing procedure: weigh bag, weigh bag, and gathered water afterwards. Water mass is the difference in terms of grams. In pure water, 1 g ≈ 1 mL, and therefore, you may directly change an amount of quantity to a volume.
Measuring spoon/cup technique: take the collected water and pour it into a spoon/cup, then estimate the volume (use standard values: 1 teaspoon = 5 mL, 1 tablespoon = 15 mL).
Divide by the elapsed time, then, to obtain something of the type mL/h (in the example, the result is in the range of 0.2 mL/h, 5 ml/25 hrs).
What is the physical mechanism that is common to both plant flow and paper towel wicking?
Capillary action. In both situations, the processes of adhesion (water clothing surfaces) and cohesion (water clothing water) combine to ensure that liquid flows without a pump in narrow spaces. Plants have biological control, as stomata open/close to regulate evaporation; a paper towel is strictly passive. It rhymes with physics, in a way that makes it a nice bridge to porous media and microchannels.
Activity 3: What is it that I measure with the paper towel apparatus – flow rate or speed?
Primarily speed, since distance per time, as the wetting front is being measured in terms of its velocity along a strip (e.g., 15 cm/5.4 min ≈ 2.8 cm/min, 15 cm/4.1 min ≈ 3.7 cm/min in the given ones). You would also require cross-section and saturation information, which would bring you nearer to flow rate, but that becomes a kitchen table experiment pretty soon, as well.
And what is its relation to serious microfluidics and actual sensors?
The paper concludes with a purposeful downsizing of the quantity: a drop of eye-dropper can contain 20 or so microliters (µL), and 1000 µL is 1 mL. When you get to uL/min (or even smaller), timing a cup under a tap is not the appropriate tool anymore, and instead, researchers rely on specialized flow sensors that have been created uniquely to be able to measure things at small flows (the page cites the Galileo flow sensor as an example). It is also here that a decent industrial R&D partner can bring things down to earth, i.e., turn the need for reliable microflow measurement within our system into a robust prototype and a repeatable procedure, which is a highly specialized engineering task.